
Prepare
Tools and materials
- Tile cutter or wet saw
- Tile nippers
- Notched trowel (size appropriate for tile)
- Tile spacers
- Grout float
- Large sponges
- 2-foot or longer level
- Measuring tape
- Pencil or grease pencil
- Voltage tester
- Mixing bucket
- Margin trowel
- Caulk gun
- Utility knife
- Rubbing stone or sandpaper
- Safety glasses
- Dust mask
- Rubber gloves
- Work gloves
- Drop cloths
- Painter's tape
Safety boundary
Stop and reassess if
- Turn off power at the circuit breaker before removing outlet covers and verify power is off with a voltage tester
- Wear eye protection when cutting or nipping tiles to prevent injury from flying fragments
- Use dust masks when mixing thin-set mortar or cutting tiles to avoid inhaling particles
- Wear rubber gloves when handling adhesive, grout, and cleaning chemicals
- Ensure adequate ventilation when working with adhesives, sealers, and caulk
- Never perform electrical work beyond removing and replacing outlet covers—consult a licensed electrician for any wiring modifications
- Keep tile edges away from skin as freshly cut tiles can be sharp
- Do not leave electrical outlets recessed behind tile—install box extenders to bring outlets flush with the finished surface
- Stop work if you discover mold, water damage, or structural issues and consult appropriate professionals
Step by step
How to approach the work
- 1
Apply Adhesive to the Wall
Mix thin-set according to package directions if using powder, or stir pre-mixed mastic thoroughly. Apply adhesive to a small section of wall using the flat side of the trowel, then comb through it with the notched side held at a 45-degree angle. The notches create ridges of consistent height that collapse when you press the tile into place, ensuring full coverage. Do not apply more adhesive than you can tile in 15 to 20 minutes, as it will begin to skin over and lose its bond strength.
- 2
Set the First Tile
Place the first tile at your marked starting point, pressing firmly with a slight twisting motion to collapse the adhesive ridges. Do not slide the tile into position, as this pushes adhesive up into the grout joints. Check that the tile sits level and plumb, making adjustments immediately. The first tile establishes the position for all subsequent tiles, so take time to verify its placement before continuing.
- 3
Build Out From the Starting Point
Install adjacent tiles, placing spacers at each corner where tiles meet. Press each tile firmly and check that it sits flush with neighboring tiles—no lippage should be visible or felt when you run your hand across the joint. If a tile sits too low, remove it, add more adhesive, and reset. If it sits too high, press harder or remove some adhesive. Check level and plumb every three to four tiles, making small adjustments before the adhesive sets.
- 4
Work Around Outlets and Obstacles
When you reach an outlet, install full tiles up to the opening, then set cut tiles around the box. The tile should fit snugly around the box without gaps larger than one-eighth inch. If the electrical box sits recessed behind the finished tile surface, you must install a box extender to bring the outlet flush with the tile—this is a task for a licensed electrician. Never leave an outlet recessed behind combustible tile where arcing could occur.
- 5
Complete the Field Tiles
Continue setting tiles in your planned pattern, working in manageable sections and maintaining consistent spacing. Step back periodically to view the overall installation, checking that rows remain straight and the pattern looks balanced. If you notice tiles drifting out of alignment, make corrections immediately rather than hoping grout will hide the problem. Clean excess adhesive from tile faces and grout joints with a damp sponge before it hardens, and remove spacers once the adhesive has set enough to hold tiles in place but before it fully cures.
- 6
Install Edge and Top Row Tiles
Cut tiles for the top row to fit the space between the last full row and the cabinet bottom. These cuts should be uniform in height across the span if your cabinets are level. If the gap varies, measure and cut each tile individually. Apply adhesive and set these tiles carefully, as narrow pieces are more fragile. For outside corners, if applicable, use bullnose tiles or edge trim pieces designed for your tile type. Allow the adhesive to cure for the time specified by the manufacturer—typically 24 hours—before proceeding to grout.
- 7
Apply Grout to Joints
Mix grout according to package directions, achieving a thick peanut-butter consistency. Let the mixed grout slake for 10 minutes, then remix without adding water. Working in sections, scoop grout onto the tile surface and spread it diagonally across joints using a rubber grout float held at a 45-degree angle. Press firmly to pack grout into joints, making multiple passes to ensure complete filling. Scrape excess grout from the tile surface by holding the float at a steep angle and working diagonally to avoid pulling grout from joints.
- 8
Clean Grout Haze
Wait 15 to 20 minutes after grouting a section, then wipe tiles with a damp sponge using light circular motions. Rinse the sponge frequently in clean water and wring it nearly dry—too much water weakens grout joints. The goal is to remove grout from tile faces while leaving joints full and smooth. After the initial wipe-down, allow grout to dry for several hours, then buff away the remaining haze with a clean, dry cloth. Avoid heavy cleaning or water exposure for 72 hours while grout cures fully.
- 9
Seal Joints With Caulk
After grout has cured for at least 48 hours, apply caulk to the joint where tile meets countertop and to any inside corners where tile meets perpendicular walls. Cut the caulk tube tip at a 45-degree angle to create a small opening, then apply a smooth bead along the joint. Tool the caulk immediately with a wet finger or caulk tool, pressing it into the joint and creating a slight concave profile. Wipe away excess with a damp cloth. Caulk remains flexible to accommodate movement between different materials, while grout would crack in these locations.
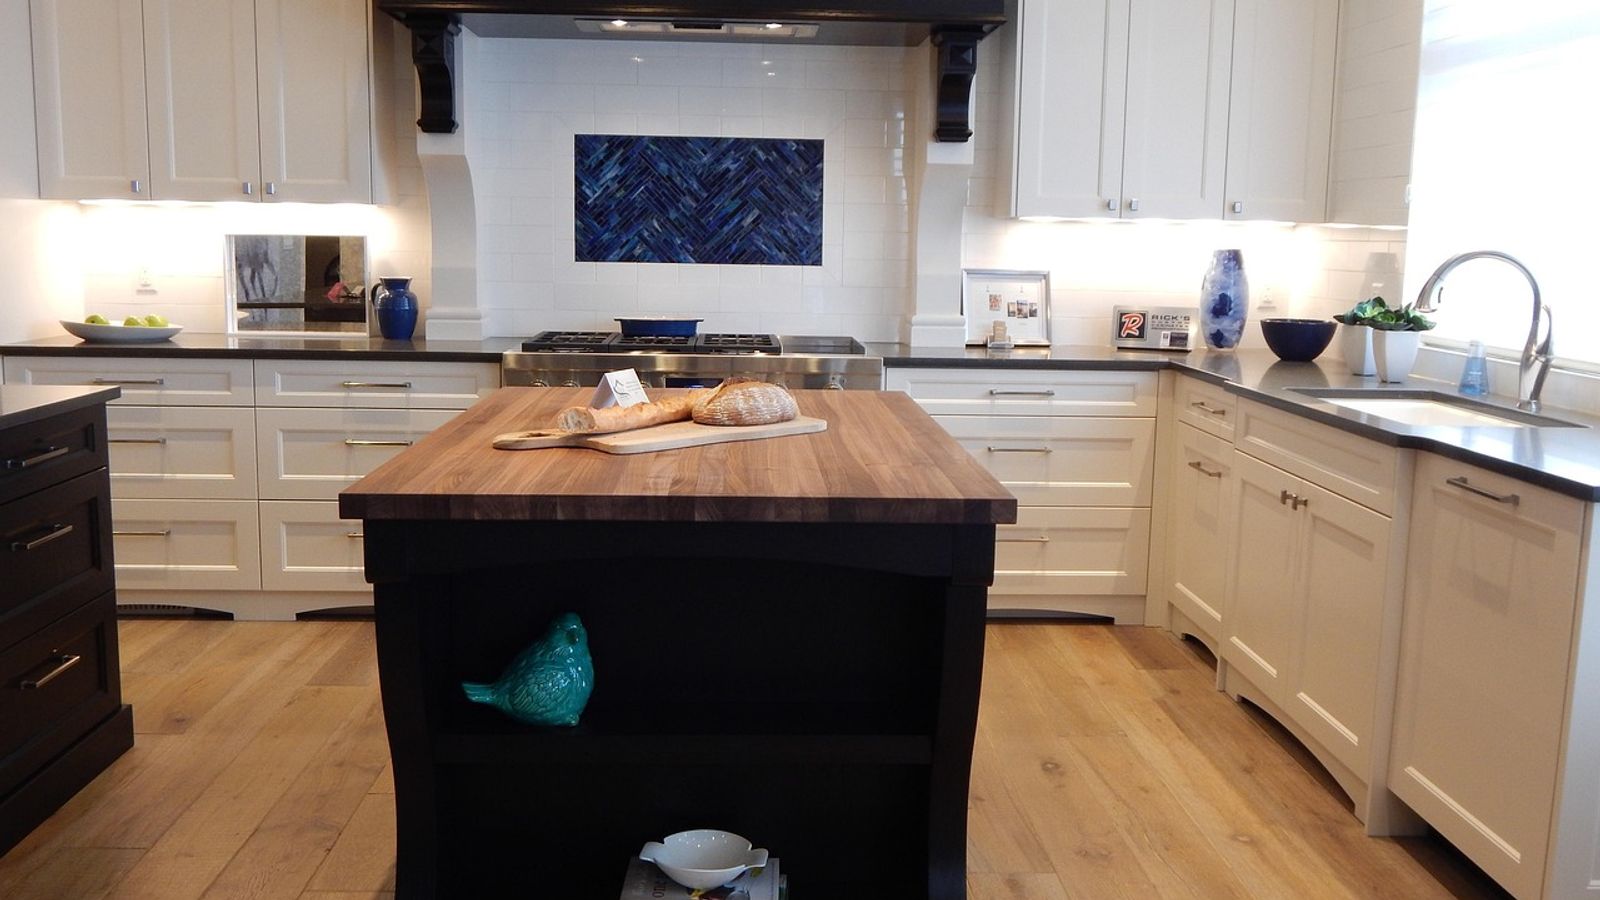
A kitchen backsplash serves two essential functions: protecting walls from water, grease, and food splatter while adding visual interest to the space. Installing tile backsplash is a project many careful homeowners can complete successfully with proper planning, the right materials, and attention to
The key to a professional-looking backsplash lies in thorough preparation and understanding the sequence of work. You will measure and plan the layout, prepare the wall surface, cut and install tiles with consistent spacing, apply grout to fill joints, and seal edges with caulk. Each phase builds on
Understanding Your Backsplash Project
Before purchasing materials or making the first cut, you need to understand the scope of your project and identify any conditions that require professional help. A standard backsplash extends from the countertop to the bottom of wall cabinets, typically covering 18 to 24 inches of wall height. The h
Examine the wall surface carefully. Painted drywall in good condition provides a suitable substrate for tile adhesive. If your walls show significant damage, have a texture coating that prevents adhesive bonding, or contain materials like wallpaper or loose paint, you will need to address these issu
Check for electrical outlets within the backsplash area. You will need to remove outlet covers and work around the electrical boxes, but you should never disconnect wiring, move boxes, or perform electrical work yourself unless you hold the appropriate license. If outlets sit proud of the wall surfa
Measure the total square footage by multiplying the height by the width of each section, then add 10 percent for cuts and breakage. Tile is sold by the square foot, and you should purchase all tiles from the same production lot to ensure color consistency. Consider the tile size in relation to your
Gathering Tools and Materials
Successful tile installation requires specific tools that ensure accurate cuts, consistent spacing, and proper adhesive coverage. You will need a tile cutter or wet saw for straight cuts, tile nippers for small adjustments around outlets, a notched trowel sized according to your tile dimensions, til
Select a tile adhesive appropriate for your tile type and wall surface. Pre-mixed mastic works well for most ceramic and porcelain tiles on drywall in dry areas, while thin-set mortar offers superior strength and water resistance, making it the better choice behind sinks and stoves. The adhesive man
Purchase sanded grout for joints wider than one-eighth inch and unsanded grout for narrower joints. Grout color dramatically affects the final appearance: matching the tile creates a seamless look, while contrasting grout emphasizes the tile pattern. You will also need latex caulk that matches or co
Safety equipment includes eye protection for cutting and nipping tiles, dust masks when mixing thin-set or cutting, and rubber gloves for handling adhesive and grout. Tile edges can be sharp, so work gloves protect your hands during cutting and handling. Ensure adequate ventilation when working with
Preparing the Work Area and Surface
Clear countertops and remove everything from the work zone. Turn off power to outlets in the backsplash area at the circuit breaker, then verify the power is off by testing with a voltage tester or plug-in device. Remove outlet and switch covers, setting the screws aside in a labeled container. Prot
Clean the wall surface thoroughly with a degreasing cleaner, paying special attention to areas near the stove where grease accumulates. Rinse with clean water and allow the wall to dry completely. Adhesive will not bond to dirty, greasy, or dusty surfaces. Sand any glossy paint lightly with 80-grit
Check the wall for level and plumb using your level. Countertops are not always perfectly level, and walls are not always perfectly plumb. If the countertop slopes more than one-quarter inch over the backsplash span, you will need to decide whether to follow the countertop line or establish a level
Mark your layout on the wall before opening any adhesive. Find the centerline of the most prominent section—usually the area between the stove and the hood—and mark it with a light pencil line. Dry-lay tiles along the counter, using spacers, to determine where cuts will fall at the ends. Adjust the
Installing the Tile
The numbered steps that follow describe the installation sequence. Work in small sections, typically three to four square feet at a time, so adhesive does not skin over before you set tiles. Maintain consistent pressure when setting tiles, check frequently with your level, and use spacers at every j
Cutting Tiles Before Installation
Before mixing adhesive or applying it to the wall, cut all tiles that require straight cuts. Measure each cut location carefully, accounting for the grout joint width. Mark the tile face with a pencil or grease pencil, then score and snap with a tile cutter or make wet cuts with a tile saw. Cut tile
Step-by-Step Installation Process
Apply Adhesive to the Wall
Mix thin-set according to package directions if using powder, or stir pre-mixed mastic thoroughly. Apply adhesive to a small section of wall using the flat side of the trowel, then comb through it with the notched side held at a 45-degree angle. The notches create ridges of consistent height that co
Set the First Tile
Place the first tile at your marked starting point, pressing firmly with a slight twisting motion to collapse the adhesive ridges. Do not slide the tile into position, as this pushes adhesive up into the grout joints. Check that the tile sits level and plumb, making adjustments immediately. The firs
Build Out From the Starting Point
Install adjacent tiles, placing spacers at each corner where tiles meet. Press each tile firmly and check that it sits flush with neighboring tiles—no lippage should be visible or felt when you run your hand across the joint. If a tile sits too low, remove it, add more adhesive, and reset. If it sit
Work Around Outlets and Obstacles
When you reach an outlet, install full tiles up to the opening, then set cut tiles around the box. The tile should fit snugly around the box without gaps larger than one-eighth inch. If the electrical box sits recessed behind the finished tile surface, you must install a box extender to bring the ou
Complete the Field Tiles
Continue setting tiles in your planned pattern, working in manageable sections and maintaining consistent spacing. Step back periodically to view the overall installation, checking that rows remain straight and the pattern looks balanced. If you notice tiles drifting out of alignment, make correctio
Install Edge and Top Row Tiles
Cut tiles for the top row to fit the space between the last full row and the cabinet bottom. These cuts should be uniform in height across the span if your cabinets are level. If the gap varies, measure and cut each tile individually. Apply adhesive and set these tiles carefully, as narrow pieces ar
Apply Grout to Joints
Mix grout according to package directions, achieving a thick peanut-butter consistency. Let the mixed grout slake for 10 minutes, then remix without adding water. Working in sections, scoop grout onto the tile surface and spread it diagonally across joints using a rubber grout float held at a 45-deg
Clean Grout Haze
Wait 15 to 20 minutes after grouting a section, then wipe tiles with a damp sponge using light circular motions. Rinse the sponge frequently in clean water and wring it nearly dry—too much water weakens grout joints. The goal is to remove grout from tile faces while leaving joints full and smooth. A
Seal Joints With Caulk
After grout has cured for at least 48 hours, apply caulk to the joint where tile meets countertop and to any inside corners where tile meets perpendicular walls. Cut the caulk tube tip at a 45-degree angle to create a small opening, then apply a smooth bead along the joint. Tool the caulk immediatel
Verifying Quality and Troubleshooting
Inspect the completed backsplash for several quality indicators. All tiles should sit flush with neighbors, with no lippage at joints. Grout joints should be uniform in width and filled completely without voids or pinholes. The caulk joint at the countertop should be smooth and continuous without ga
Lippage between tiles usually results from inadequate adhesive coverage or failing to check level during installation. Minor lippage can be addressed by carefully grinding the high edge with a rubbing stone, but significant differences indicate poor installation that may require removing and resetti
If tiles sound hollow when tapped but remain firmly attached, the adhesive coverage was insufficient. This condition may not cause immediate failure but reduces long-term durability. Monitor these areas for movement or cracking. If tiles become loose, remove them carefully, scrape away old adhesive,
Cleanup and Maintenance
Remove all protective coverings from countertops and floors, disposing of adhesive and grout containers according to local regulations. Clean tools immediately after use—dried thin-set and grout are extremely difficult to remove. Soak trowels, floats, and buckets in water, then scrub with a stiff br
Reinstall outlet and switch covers once caulk has cured, typically after 24 hours. If covers no longer fit flush against the tile surface, you may need deeper covers or box extenders—consult a licensed electrician if you are uncertain about proper installation. Restore power at the circuit breaker a
Maintain your backsplash by wiping spills promptly and cleaning regularly with a pH-neutral tile cleaner. Avoid abrasive scrubbers that can scratch tile surfaces or damage grout. Inspect caulk joints annually and recaulk if you notice gaps, cracks, or separation. Well-installed tile backsplashes req
When to Call a Professional
Stop work and consult a qualified professional if you encounter conditions beyond the scope of this project. Any electrical work beyond removing and replacing cover plates requires a licensed electrician. If you discover damaged electrical boxes, wiring problems, or need to relocate outlets, do not
Significant wall damage, water stains indicating active leaks, or structural concerns require professional assessment before covering with tile. If you find mold growth, especially black mold, during surface preparation, consult a remediation specialist. Installing tile over compromised surfaces tra
Large or complex backsplash projects involving intricate patterns, expensive materials, or challenging layouts may justify hiring a professional tile installer. If your project includes removing existing tile, working with natural stone that requires special handling, or installing backsplash in are
Sources
Original information
- Consumer Guide to Kitchen Appliances — U.S. Department of Energy
- Online Permit Submission — City of Jacksonville