
Prepare
Tools and materials
- Composite deck cleaner
- Soft-bristle brush
- Garden hose or pressure washer (1,500 PSI max)
- Drill with bits
- Screwdriver bits
- Circular saw
- Carbide-tipped saw blade for composites
- Tape measure
- Carpenter's square
- Pry bar
- Putty knife
- Manufacturer-approved color-matched filler
- Heat gun (optional)
- 220-grit sandpaper
- Composite-safe stain remover
- Hidden fastener removal tool (if applicable)
- Replacement composite boards
- Composite deck screws or hidden fasteners
- Joist hangers and fasteners (if adding blocking)
- Safety glasses
- Work gloves
- Knee pads
Safety boundary
Stop and reassess if
- Wear safety glasses when cutting composite materials, as dust and chips can cause eye injury
- Use work gloves when handling composite boards to prevent splinters from cut edges and fiberglass-like fibers
- Wear a dust mask when cutting or sanding composite decking, as the material produces fine particles that should not be inhaled
- Never exceed 1,500 PSI when pressure washing composite decking, and maintain at least 8 inches distance to avoid surface damage
- Keep heat guns moving constantly and maintain proper distance to prevent melting, fire hazard, or toxic fumes from overheated plastic
- Ensure stable footing when working on deck surfaces, especially near edges and stairs
- Check that the deck structure can safely support your weight before walking on areas with suspected structural damage
- Disconnect power tools when changing blades or bits to prevent accidental startup
- Support both sides of composite boards when cutting to prevent binding and kickback
- Stop work immediately if you discover structural damage, rotted framing, or compromised ledger board attachment and consult a qualified professional
Step by step
How to approach the work
- 1
Clean and expose the damaged area
Apply composite deck cleaner to the damaged section and surrounding boards according to product instructions, typically allowing 10 to 15 minutes of dwell time. Scrub with a soft-bristle brush, working in the direction of the grain pattern. Rinse thoroughly with a garden hose or low-pressure washer (below 1,500 PSI) held at least 8 inches from the surface. Allow the area to dry completely for 24 hours before proceeding, as moisture affects filler adhesion and makes damage assessment difficult.
- 2
Determine repair method based on damage type
For scratches less than 1/16 inch deep, plan to use manufacturer-approved color-matched filler or heat-based repair. For cracks, splits, or damage extending through the board thickness, mark the board for replacement. For stains, identify the source and select appropriate composite-safe cleaners. Measure damaged boards to determine replacement length, accounting for the nearest joist centers on each side of the damage plus overhang if at deck edges.
- 3
Remove damaged boards if replacement is required
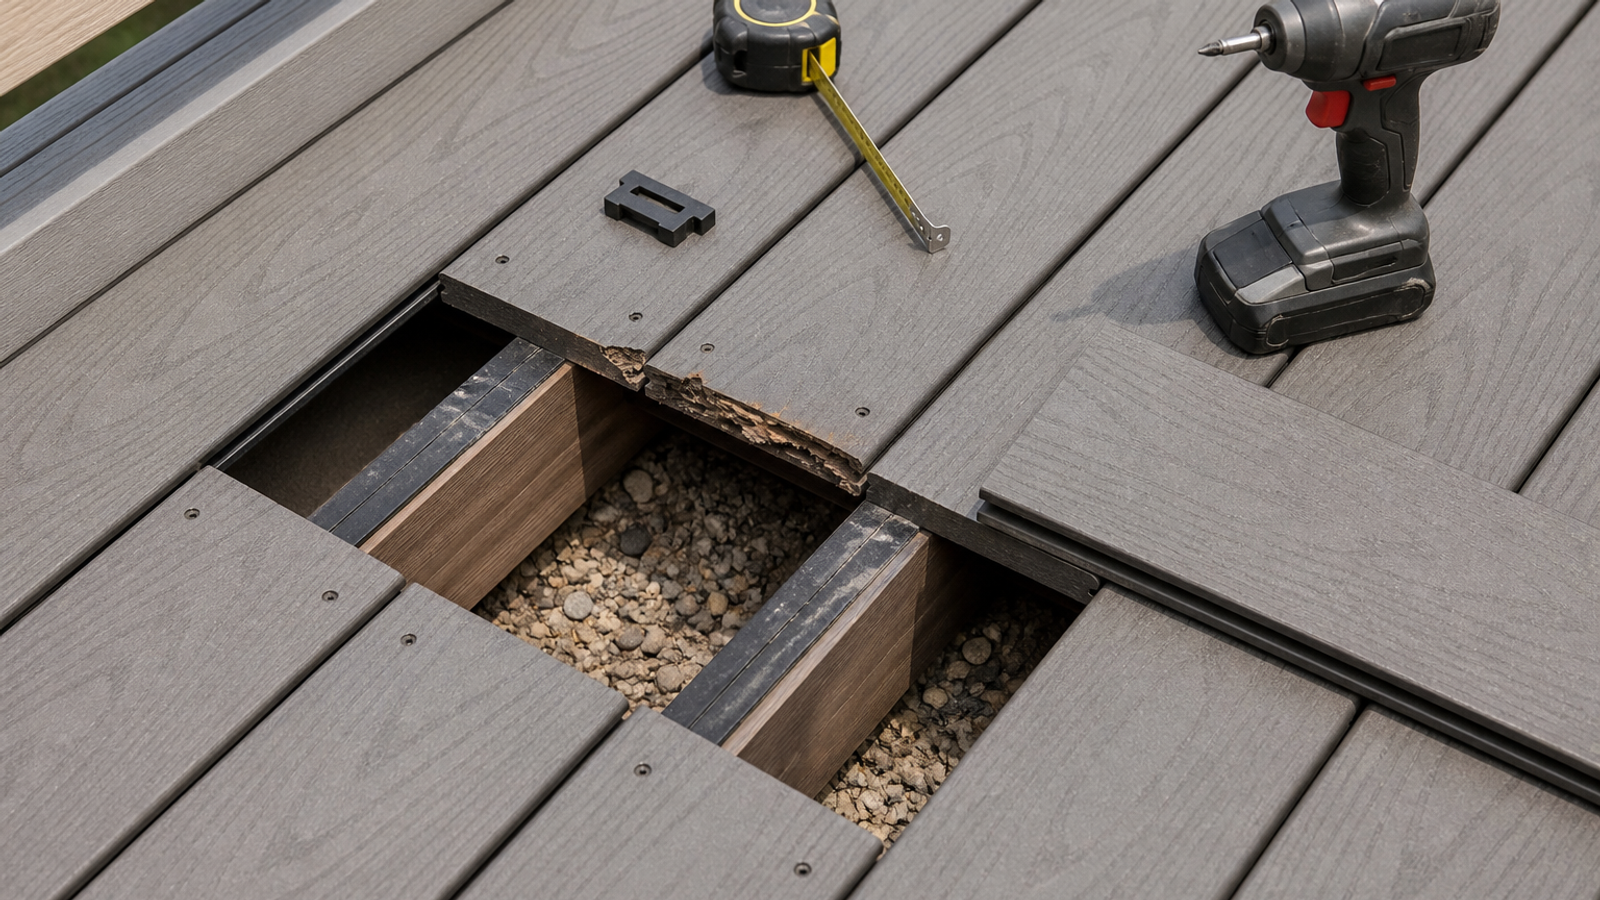
Locate and remove all fasteners holding the damaged board using a drill with appropriate bit or hidden fastener removal tool. For face-screwed boards, back out screws completely and save if reusable. For hidden fastening systems, consult manufacturer instructions for the specific clip or track system used. Pry the damaged board up gently, working from one end and supporting adjacent boards to prevent damage. If the board resists removal, check for additional fasteners or adhesive that must be cut.
- 4
Inspect and prepare the substructure
Examine all joists, blocking, and framing where the damaged board was attached. Look for rot, insect damage, loose connections, or missing fasteners. Verify joist spacing matches manufacturer requirements for your specific composite product. Add blocking between joists if board ends will land between existing supports, securing blocking with joist hanger nails or structural screws. Clean debris from joist tops and ensure surfaces are dry before installing replacement boards.
- 5
Cut and fit replacement boards
Measure the exact length needed, accounting for the manufacturer's specified end gap (typically 1/4 inch but verify for your product and installation temperature). Cut composite boards with a circular saw equipped with a carbide-tipped blade designed for composite materials, supporting both sides of the cut to prevent chipping. Test-fit the board before fastening, ensuring proper gaps at ends and sides. The board should rest flat on all supporting joists without rocking or gaps exceeding 1/8 inch.
- 6
Fasten replacement boards securely
Install fasteners matching the original system, whether face screws, hidden clips, or grooved-edge tracks. For face screwing, pre-drill holes slightly smaller than screw diameter to prevent board splitting, positioning screws 3/4 inch from board edges and centered on joists. Drive screws until heads are flush with the surface, avoiding over-driving that dimples the material. For hidden systems, engage clips or tracks according to manufacturer instructions, ensuring each fastener clicks or seats fully before moving to the next joist.
- 7
Repair surface damage with filler or heat method
For shallow scratches and gouges, apply manufacturer-approved color-matched filler using a putty knife, slightly overfilling the damaged area. Allow filler to cure per product instructions, typically 30 minutes to 2 hours. Sand lightly with 220-grit sandpaper in the direction of the grain pattern until flush with surrounding surface. Alternatively, for minor scratches on solid-color boards, use a heat gun on low setting held 6 to 8 inches from the surface, moving constantly to slightly melt and reflow the polymer cap into scratches. Stop immediately if the surface becomes shiny or begins to bubble.
- 8
Address stains with appropriate cleaners
Apply composite-safe stain remover specific to the stain type—oxalic acid-based products for tannin and rust, oxygen bleach for mold and mildew, or degreaser for oil-based stains. Follow product instructions for application method and dwell time, typically 10 to 20 minutes. Scrub gently with a soft brush, avoiding abrasive pads that scratch the surface. Rinse thoroughly and allow to dry completely. If staining persists, repeat the treatment once more, but if discoloration remains after two applications, the stain has likely penetrated beyond the cap layer and board replacement may be the only solution.
- 9
Tighten loose fasteners and address movement
For boards that move or squeak but show no visible damage, locate loose fasteners by walking the deck and noting movement points. Remove backed-out screws, inspect holes for stripping or enlargement, and reinstall with slightly larger diameter screws if needed, or relocate fasteners 2 inches from original holes. If hidden fasteners have released, remove the affected board section, install new clips or fasteners, and re-engage the board. Add blocking between joists if movement indicates inadequate support, securing blocking to joists before re-fastening deck boards.
- 10
Blend and finish repaired areas
For filled repairs, check that sanded areas are smooth and flush by running your hand across the surface. If texture remains noticeably different from surrounding embossed patterns, apply additional filler in thin layers to build up texture, allowing each layer to cure before adding the next. Clean the entire deck section including repaired areas to promote even weathering. Avoid applying sealers, stains, or coatings unless specifically recommended by the composite manufacturer, as most composite products are designed to weather naturally without additional finishes.
- 11
Perform final inspection and testing
Walk the entire repaired area, testing for movement, squeaks, or instability. Check all fasteners visually to confirm proper seating and alignment. Measure gaps between board ends and sides to verify they fall within manufacturer specifications. Inspect from below if accessible, confirming that no fasteners have penetrated completely through boards and that structural connections remain secure. Document the repair with photos and notes about materials used, storing this information with home maintenance records for warranty purposes and future reference.
Composite decking combines wood fibers and plastic polymers to create a low-maintenance alternative to traditional lumber, but these materials still require occasional repair. Unlike wood, composite boards cannot be sanded deeply or refinished in the traditional sense, which means repair techniques
Understanding Composite Deck Damage
Composite decking damage falls into distinct categories that require different repair methods. Surface scratches, scuffs, and minor gouges affect only the outer protective layer or cap stock without compromising structural integrity. Cracks, splits, or breaks that extend through the board thickness
The manufacturer of your specific composite decking determines which repair methods preserve warranty coverage and achieve acceptable results. Most major brands publish repair guidelines, approved touch-up products, and replacement procedures. Before beginning any repair, identify your decking brand
Preparation and Assessment
Begin by thoroughly cleaning the damaged area and surrounding boards to reveal the full extent of damage. Use a deck cleaner formulated for composite materials, following the product instructions for dilution and dwell time. Avoid pressure washers set above 1,500 PSI or fan tips held closer than 8 i
Examine the substructure beneath damaged boards by removing fasteners or accessing from below if possible. Check joist condition, spacing, and attachment. Composite boards require specific joist spacing—typically 12 or 16 inches on center depending on board thickness and manufacturer specifications.
Gather materials specific to your repair type. For surface repairs, obtain manufacturer-approved color-matched filler, heat gun or composite repair kit, and fine-grit sandpaper (220-grit or finer). For board replacement, source exact-match boards from the original manufacturer when possible, as colo
Safety Boundaries and When to Call a Professional
Homeowners can safely address surface repairs, individual board replacement, fastener corrections, and cleaning within the deck field. However, certain conditions require professional expertise. If damage involves the ledger board attached to your house, the structural framing, posts, beams, or any
Electrical work including low-voltage lighting repairs beyond simple bulb replacement, and any line-voltage electrical components require a licensed electrician. If your deck repair uncovers evidence of insect infestation in structural wood members, water intrusion into the building envelope, or fou
Verification and Quality Checks
After completing repairs, verify that replaced boards sit flush with adjacent surfaces, with no lips or height differences exceeding 1/8 inch that could create trip hazards. Check that all fasteners are driven to the manufacturer's specified depth—typically flush with the board surface for face scre
For surface repairs using filler or heat methods, examine the repair under different lighting conditions including direct sunlight and shade. Color matching on composite materials changes with UV exposure, so fresh repairs may appear slightly different initially but should blend over several weeks o
Inspect the area beneath repaired sections for debris, fasteners, or tools. Check that joist hangers remain properly seated, that blocking added during repair is secure, and that no new gaps exist between the deck frame and the house. If you added or replaced flashing during ledger board work, verif
Troubleshooting Common Issues
If replacement boards do not fit properly, verify that you have the correct profile and that joists are spaced according to the original installation. Composite boards expand and contract with temperature changes, so maintain the manufacturer's specified gap between board ends—typically 1/4 inch but
When surface repairs remain visible or texture does not match, the issue often stems from using generic fillers rather than manufacturer-specific products, or attempting repairs on boards with deep embossed grain patterns that cannot be replicated with filler. Some composite products feature a co-ex
Persistent stains after cleaning indicate either staining agents that have penetrated the cap layer, or discoloration from within the board core. Tannin bleed from the wood fiber component appears as brown streaking and may require multiple treatments with oxalic acid-based cleaners formulated for c
Maintenance After Repair
Newly repaired composite decking requires a break-in period before resuming normal use. Allow filled or heat-repaired surfaces to cure for 24 to 48 hours before placing furniture or foot traffic on the area. Replaced boards should be fastened and stable immediately, but avoid concentrated loads on s
Establish a regular cleaning schedule to prevent future damage. Most composite decking performs best with twice-yearly cleaning using manufacturer-approved products and soft-bristle brushes. Address spills, especially from grease, wine, or acidic substances, immediately to prevent staining. Trim veg
Monitor repaired areas through seasonal changes. Composite materials expand and contract more than wood, and repairs made during temperature extremes may show gaps or compression when conditions moderate. If gaps exceed manufacturer specifications or boards begin to lift, re-evaluate fastener placem
Sources
Original information
- Online Permit Submission — City of Jacksonville
- Florida Building Code Resources — Florida Building Commission