
Prepare
Tools and materials
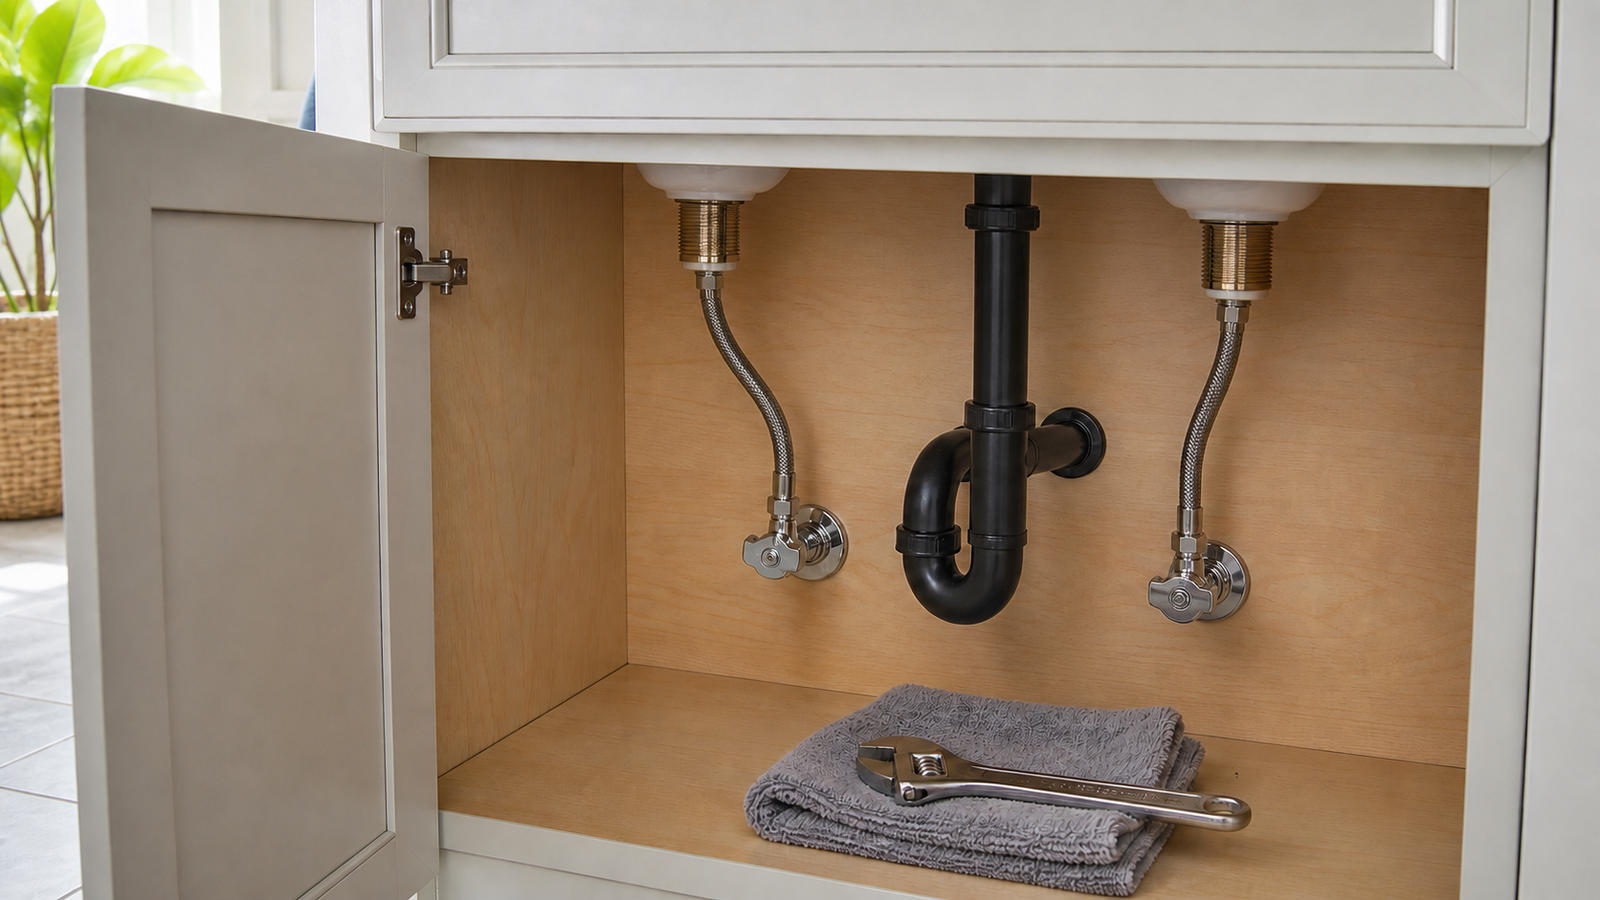
- adjustable wrench (two)
- basin wrench
- bucket or shallow pan
- towels
- work light
- replacement flexible supply lines
- paper towels
Safety boundary
Stop and reassess if
- Always shut off water at the fixture shutoff valves before disconnecting supply lines
- Open faucet handles to relieve pressure before loosening connections
- Never use excessive force when tightening compression fittings
- Hold valve bodies steady when loosening or tightening connections to prevent pipe damage
- Stop work if shutoff valves leak or cannot be fully closed
- Do not reuse old supply lines or attempt to repair damaged lines
- Avoid over-tightening connections, which can crack fittings or strip threads
- Keep the work area dry to prevent slipping in confined spaces
- Do not apply thread tape or pipe compound to compression fittings
- Call a professional if you discover corroded valves, damaged threads, or structural problems
Step by step
How to approach the work
- 1
Shut Off Water and Relieve Pressure
Locate the shutoff valves directly beneath the sink, typically mounted on the wall or cabinet back where water lines emerge. Turn both hot and cold shutoff valves clockwise until they stop; most valves require two to three full rotations. Open the faucet handles to both hot and cold positions to drain residual water from the lines and relieve pressure. Leave the faucet open throughout the replacement process.
- 2
Position Your Work Area and Protect the Cabinet
Place a bucket or shallow pan directly under the supply line connections to catch water that will drain when you disconnect the lines. Lay towels on the cabinet floor to absorb drips and provide cushioning for your back and shoulders. Position a work light so you can see both connection points clearly. Clear all items from under the sink to give yourself unrestricted access and room to maneuver tools.
- 3
Disconnect the Supply Line from the Faucet Tailpiece
Locate the upper connection where the supply line attaches to the faucet tailpiece, which extends down from the faucet body. Hold the tailpiece steady with one adjustable wrench while turning the supply line nut counterclockwise with a second wrench. If space is limited, use a basin wrench designed for tight overhead work. Water will drain from the line as you loosen the connection; this is normal and expected.
- 4
Disconnect the Supply Line from the Shutoff Valve
Move to the lower connection at the shutoff valve outlet. Hold the valve body firmly with one wrench to prevent it from turning while you loosen the supply line nut counterclockwise with a second wrench. Turning the valve body can damage the pipe connection behind it, so maintain steady counter-pressure. Once the nut is loose, unscrew it by hand and remove the supply line completely.
- 5
Inspect and Clean the Connection Points
Examine the threads on both the shutoff valve outlet and the faucet tailpiece for corrosion, damage, or debris. Wipe the threads clean with a dry cloth to remove mineral deposits, old pipe dope, or thread tape residue. Check that the valve outlet and tailpiece are dry; if water continues to seep from the valve, it has failed and requires professional replacement before you can proceed.
- 6
Prepare the New Supply Line Connections
Remove the new supply line from its packaging and inspect both ends for damage during shipping. Verify that rubber or fiber washers are present inside each connector nut if the line design uses them; some integrated-seal designs do not require separate washers. Do not apply pipe thread compound or thread tape to compression fittings, as these can interfere with the seal and cause leaks.
- 7
Attach the Supply Line to the Shutoff Valve
Thread the lower connector nut onto the shutoff valve outlet by hand, turning clockwise. Ensure the nut starts straight and turns smoothly for at least three complete rotations before using a wrench. Once hand-tight, hold the valve body steady with one wrench and tighten the supply line nut with a second wrench, turning clockwise until you feel firm resistance. Add one-quarter to one-half turn beyond hand-tight; do not force the connection or over-tighten, as this can crack the nut or damage the internal seal.
- 8
Attach the Supply Line to the Faucet Tailpiece
Guide the upper end of the supply line to the faucet tailpiece, ensuring the line has a gentle curve without kinks or sharp bends. Thread the connector nut onto the tailpiece by hand, turning clockwise until hand-tight. Hold the tailpiece steady with one wrench while tightening the supply line nut with a second wrench. Apply the same tightening technique: firm resistance plus one-quarter to one-half turn. The connection should feel solid but not require excessive force.
- 9
Repeat for the Second Supply Line
Follow the identical procedure for the second supply line, whether hot or cold. Maintain the same careful hand-threading and tightening technique for both connections. Ensure both supply lines hang with similar curves and do not cross or rub against each other, as contact points can cause wear over time.
- 10
Restore Water Pressure and Check for Leaks
With the faucet still open, slowly turn both shutoff valves counterclockwise to restore water flow. Open the valves gradually over five to ten seconds rather than all at once, as sudden pressure can stress new connections. Watch all four connection points closely as pressure builds. Water should flow from the faucet without any dripping at the connections. If you observe leaks, close the shutoff valve immediately and proceed to the troubleshooting section.
Flexible faucet supply lines connect the shutoff valves under your sink to the faucet tailpieces above. These lines typically last eight to ten years before the internal rubber deteriorates, connectors corrode, or the braided exterior shows signs of wear. Replacing them before failure prevents water
This guide covers the complete process for replacing flexible supply lines serving kitchen and bathroom faucets. The work involves shutting off water, disconnecting old lines, selecting appropriate replacements, and installing new lines with proper hand-tightening technique. You will not need to sol
Understanding Supply Line Types and Failure Modes
Flexible supply lines come in three common constructions: braided stainless steel over rubber, braided polymer, and corrugated stainless steel. Braided stainless steel lines feature a woven metal jacket surrounding an inner EPDM or synthetic rubber hose. Braided polymer lines use a reinforced plasti
Supply lines fail in predictable patterns. The rubber core degrades over time, becoming brittle and developing pinhole leaks that seep water slowly or burst suddenly. Connector nuts corrode where dissimilar metals contact each other or where mineral deposits accumulate. The braided exterior frays or
Preparation and Material Selection
Before purchasing replacement lines, measure the distance from the shutoff valve outlet to the faucet tailpiece connection point. Add four inches to this measurement to account for the curve and provide working slack. Supply lines are sold in standard lengths: twelve, sixteen, twenty, and thirty inc
Identify the connection sizes at both ends. Most faucet tailpieces use three-eighths-inch compression fittings, while shutoff valves typically have three-eighths-inch or one-half-inch compression outlets. The supply line packaging lists inlet and outlet sizes clearly. If your existing lines have no
Braided stainless steel lines offer the best combination of durability, flexibility, and burst resistance for most residential applications. Select lines with solid brass or stainless steel nuts rather than plastic, as metal fittings seal more reliably and resist cross-threading. Avoid the shortest
Tools and Materials You Will Need
Safety Boundaries and When to Call a Professional
This project is appropriate for homeowners comfortable working in confined spaces and hand-tightening plumbing fittings. You should not attempt this work if the shutoff valves are frozen, corroded, or leak when turned, as valve replacement requires different skills and may involve cutting pipes. Do
Call a licensed plumber if you discover active leaks behind walls, if the shutoff valves break when you attempt to close them, or if you cannot access the supply line connections due to cabinet construction or fixture placement. A professional should handle any situation where the permanent plumbing
Stop work immediately if you cannot stop water flow after closing the shutoff valve, if you strip threads while tightening connections, or if you discover mold, rot, or structural damage in the cabinet. These conditions indicate problems beyond simple supply line replacement and require professional
The Replacement Process
Verification and Leak Testing
After completing installation, open the shutoff valves slowly while watching both connections closely. Water pressure will build gradually. Check for drips at the valve connection first, then at the faucet tailpiece connection. A few drops during initial pressurization may appear as trapped air esca
Open the faucet and let water run for two minutes. This flushes any debris from the new lines and allows you to observe the connections under flow conditions. While water runs, feel along the entire length of each supply line for moisture. Dry your hands and run them over the braided exterior and bo
Place a dry paper towel under each connection point and leave it for fifteen minutes with the shutoff valves open and the faucet closed. This static pressure test reveals slow seeps that might not appear during flow. Check the paper towels for any moisture. If they remain completely dry, the install
Troubleshooting Common Installation Problems
If a connection leaks despite proper tightening, the issue typically involves cross-threading, damaged threads, or a defective fitting. Close the shutoff valve, relieve pressure by opening the faucet, and disconnect the leaking fitting. Inspect the threads on both the supply line nut and the valve o
Cross-threading occurs when the nut starts at an angle rather than perpendicular to the threads. The nut will turn easily at first, then suddenly become difficult. If you suspect cross-threading, unscrew the nut completely and restart the connection. Thread the nut by hand for at least three full ro
A connection that weeps slowly despite appearing tight may lack sufficient compression on the internal seal. Some supply lines use cone-shaped ferrules that must compress fully to seal. Tighten the connection an additional half-turn while holding the valve or tailpiece steady with a second wrench. I
If water continues to flow from the faucet after closing the shutoff valve, the valve has failed internally. You must shut off water at the main service valve, which is typically located where the water line enters your home or at the water meter. Main shutoff procedures vary by building type and lo
Cleanup and Maintenance
Wipe down all connections and the cabinet interior with dry towels to remove any water from testing. Check the cabinet floor for standing water and dry it completely to prevent mold growth. Inspect the area under the sink for any items that may have gotten wet during the replacement process. Dispose
Mark your calendar to inspect the new supply lines in one month, then every six months thereafter. During inspections, look for moisture on the line exterior, corrosion at fittings, bulges in the braided covering, or mineral deposits around connections. Feel the lines for soft spots or unusual flexi
Keep the area under the sink organized and avoid storing heavy items against the supply lines. Pressure from stored goods can stress connections or kink the lines. Ensure cleaning products and other chemicals are stored in sealed containers, as some chemicals accelerate corrosion of metal fittings.
Sources
Original information
- WaterSense Home Maintenance — U.S. Environmental Protection Agency
- Fix a Leak Week — U.S. Environmental Protection Agency